
Cutting Edge Zoom Feature- PowerPoint as Virtual Background
It’s Finally Here!
2022 Update-
- This feature is out of Beta.
- Still underutilized in my opinion.
- All steps and tips below are the same.
- Enjoy, standout, and engage using it!
I have been waiting years for this Zoom feature. Use it to create studio quality productions, live and recorded, without the studio.
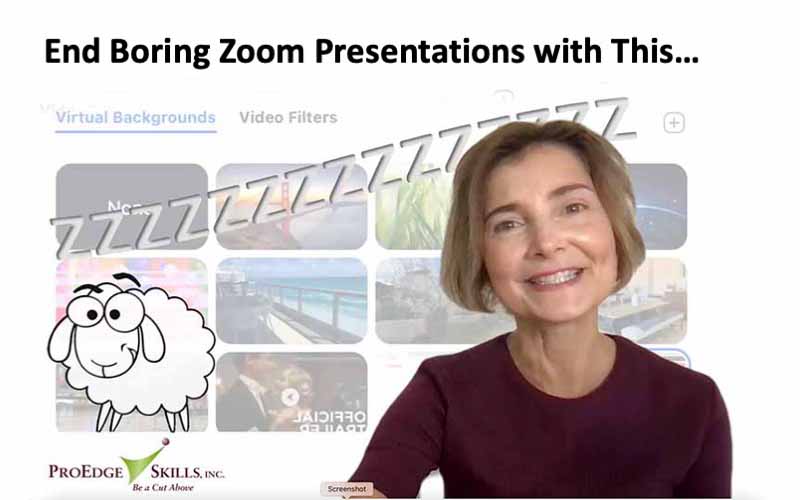
Virtual Backgrounds are wonderful. The same virtual background for an entire presentation???
Snoozeville.
- What if you could put slides from a PowerPoint deck behind you as a series of virtual backgrounds?
- What if you could remain life-size instead of becoming a postage stamp inside your own presentation?
Well, now you can!
Watch this new Zoom PowerPoint feature in action below. Read on for How-Tos, especially how to preserve the effect when you record.
Connect. Engage. Standout.
Why use PowerPoint as your Virtual Background? Why not just share your PowerPoint slides as always?
When we share PowerPoint our video becomes small like a postage stamp in the corner of the screen. Not good for connecting.
The BIG difference with making PowerPoint a virtual background is that our video can be BIG. Watch the video above to see the effect in action.
That is how you connect, engage, and standout.
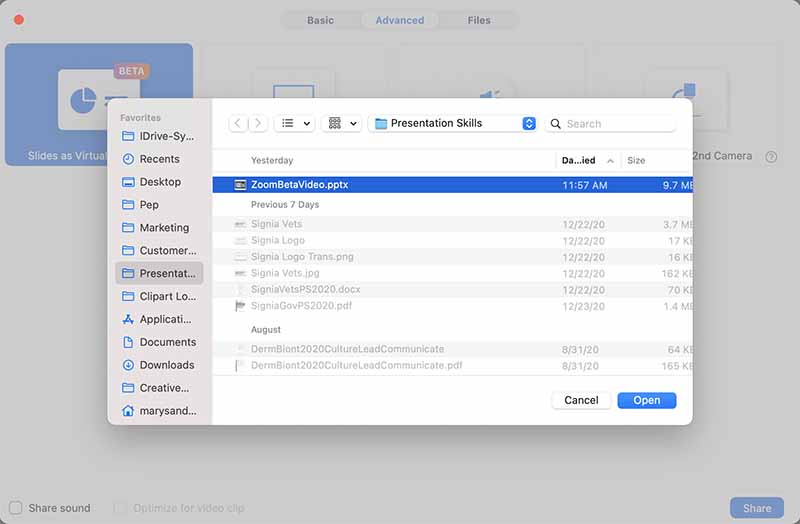
How to Use Slides as Virtual Background
1. Click the green Share Button

2. Choose Advanced Tab in the middle of the Share Window
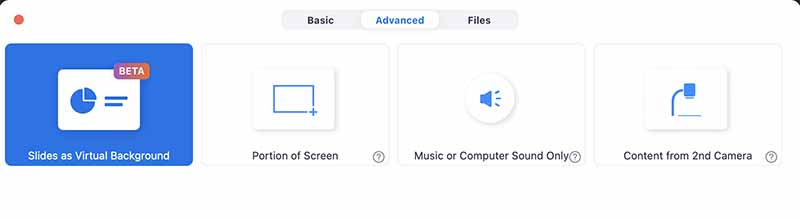
3. Double Click and Upload Your PowerPoint Slides
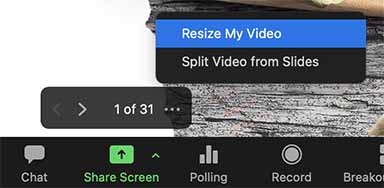
4. IMPORTANT Turn on your video. Click the 3 dots next to the number of slides. Choose Resize Video from the popup menu. Make video large by dragging the handles that appear on your video.
Tips for Connecting & Standing Out
- No need for a green screen.
In the video above I had a solid, cream colored wall behind me. - Have light coming from in front of you.
I had a window in front of me and one, small extra LED light. Light from in front of you is important. - I used a separate microphone.
Do buy a microphone. It can be inexpensive and a clip-on if you like. Do not use your computer’s microphone. - I used the camera on my MacBook Pro.
If you have a separate webcam you will get even better results. Yet, the results were good with the computer’s camera. For client work, I use our studio camera. - Camera angle straight or slightly down.
These provide the most flattering camera angles. Avoid having the camera looking up at you. An up angle would happen for example if your laptop was in your lap and the camera had to be angled upwards to see your face. - Sit off-center.
In the video above I am sitting so I appear to the right. Sitting off-center will allow you to create slides using 2/3 of the slide for things that need to be seen by the audience. Plenty of real estate to be engaging if you are not creating wordy slides.
Recording
- Record to Your Computer.
As of this posting, Cloud Recording does not support resized video. The video will default back to the small postage stamp size. Hopefully this will change.
To capture your video large like mine above, record locally to your computer. Follow steps below to record locally.
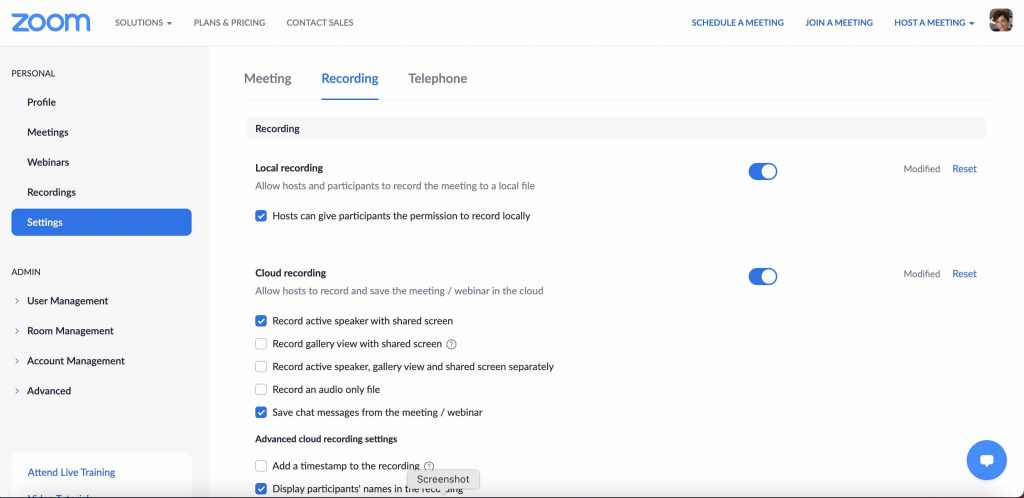
Allow Local Recording
- Login to your Zoom Account online
- Choose Settings on left side
- Choose Recording on Middle Tab
- Turn on Local Recording (first item)
Choose Local Recording
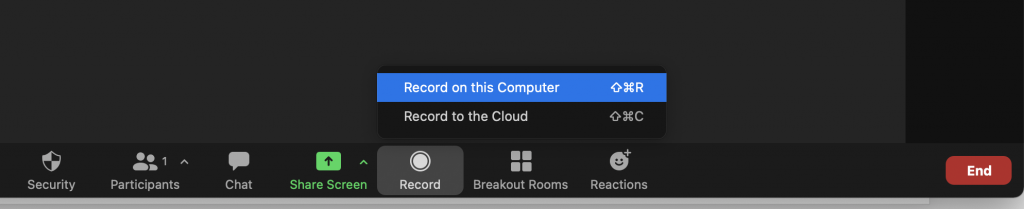
- Start your Zoom Meeting
- Click Record at bottom of Zoom App
- A menu will appear if Cloud and Local Recording are enabled
- Choose Record on this Computer
(Cloud Recording does NOT preserve the large video at this time)
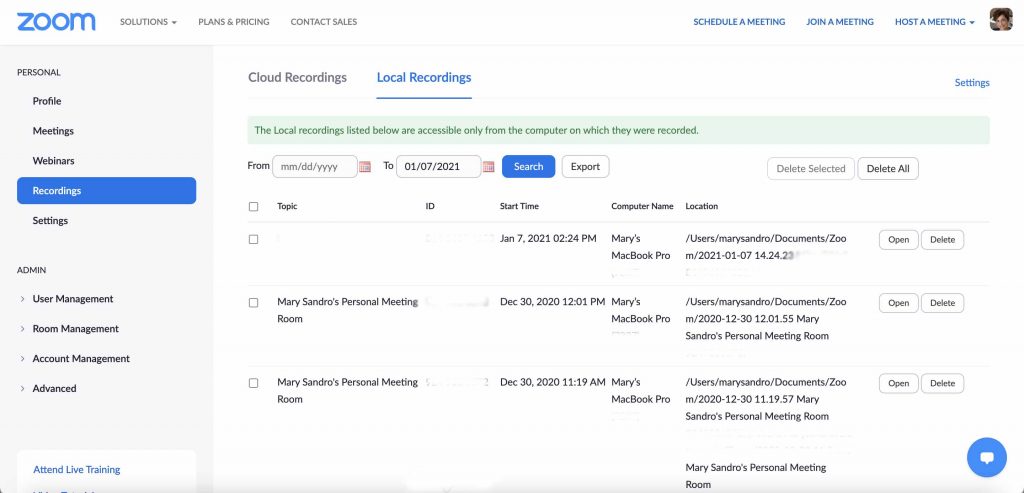
Find Local Recording
- Login to your Zoom Account online
- Choose Recordings on left side
- Choose Local Recording on second Tab
- Click Open next to file
Find this Helpful?
Want to sell more, lead better, or teach faster?
We teach you how in 60 minutes.
Call now to learn more 800-731-0601 or click here to Get Started online.
Great job, Mary!
BTW, I’m unable to access this functionality, but have now signed up to join the “beta” club, so, who knows, maybe they’ll let me in and I can start making better presentations,
Regardless, I have shared this with others and some have already got quite excited.
Best of luck!
Abrazo
J